The Homeowner’s Guide to Garage Door Openers
A garage door opener is the motor and control system that moves a door that is already properly balanced. It does not carry the door’s weight, the springs do, so a new opener on a door that binds or feels heavy will not fix the real problem. As of November 2026, an opener installed by a pro typically costs about $300 to $900, with chain drives at the low end and wall-mounted units at the high end. Choose by door type, available space, noise, and the controls you need. If the door is crooked, off track, or unusually heavy, get the door assessed before you use or replace the opener.
What you’ll learn
- How the motor, rail, controls, and safety devices work together.
- How chain, belt, screw, and wall-mounted openers compare, with dated cost ranges.
- How to find your model and check remote, keypad, and smart-feature compatibility.
- What battery backup does and does not do in an outage.
- When to repair an opener, when to replace it, and when the door needs attention first.
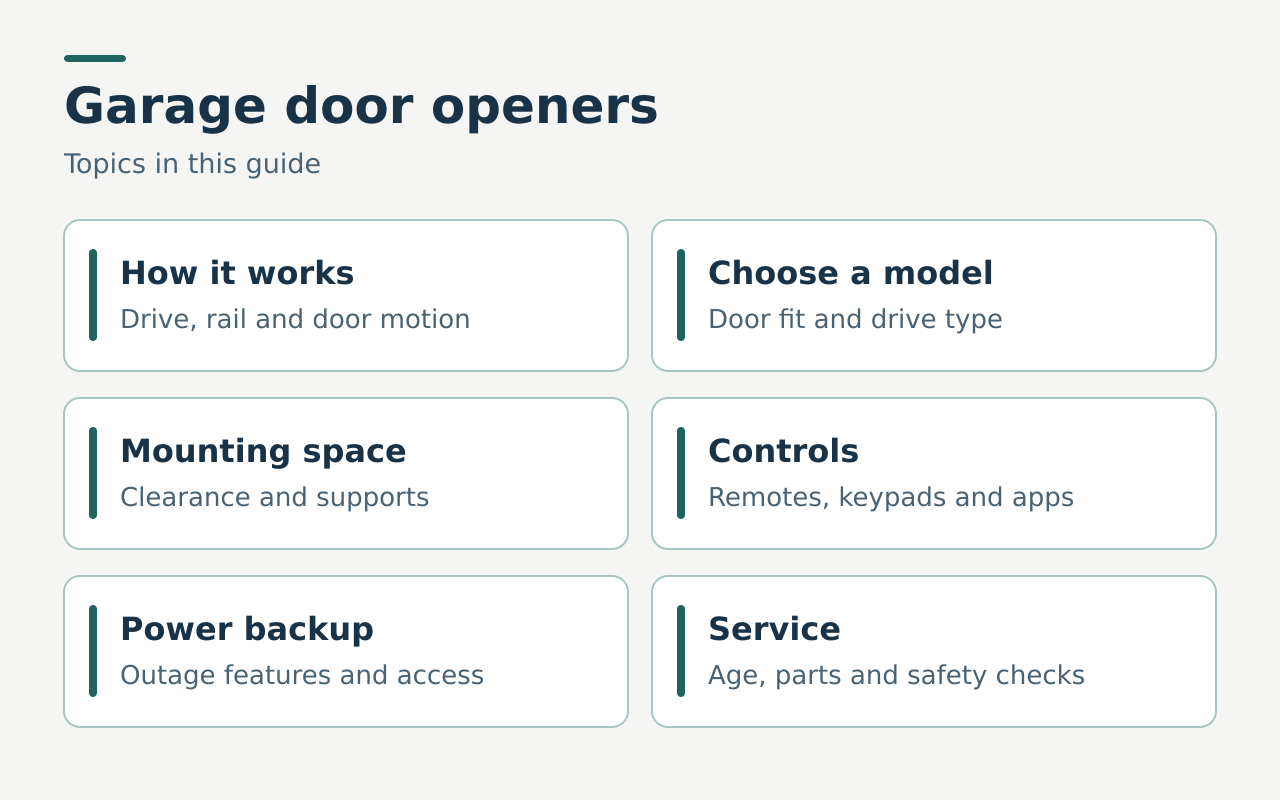
Contents
- How the system works
- Which parts belong to the opener?
- Find your opener model and manual
- How to choose an opener for your door and garage
- Opener costs at a glance
- Mounting, space, and vibration
- How travel limits relate to safety
- Remotes, wall controls, and keypads
- Smart opener and phone features
- Battery backup and a power outage
- Age, service history, and repair or replace
- Compare models and brands by the documents
- Choosing for three common garage layouts
- Common opener problems at a glance
- What you can check and when to get service
- What goes into an opener quote?
- Four real-life opener scenarios
- Garage door opener safety reminders
- FAQ
- Next step
How the system works
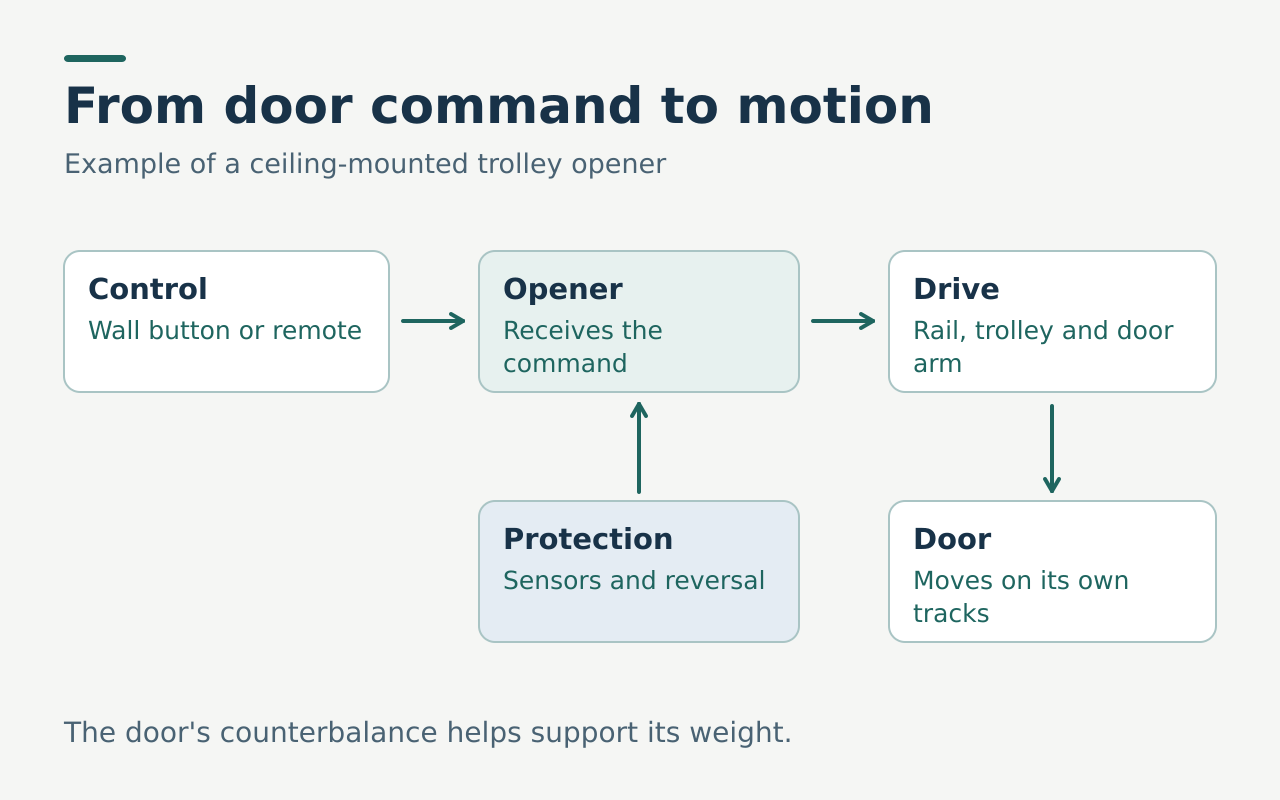
A command comes from a wall control, handheld remote, wireless keypad, or supported app. The opener receives it, checks the conditions it was designed to run under, and moves the door until it reaches its programmed stop or something makes it stop or reverse. Details vary by model and by whether the door is opening or closing.
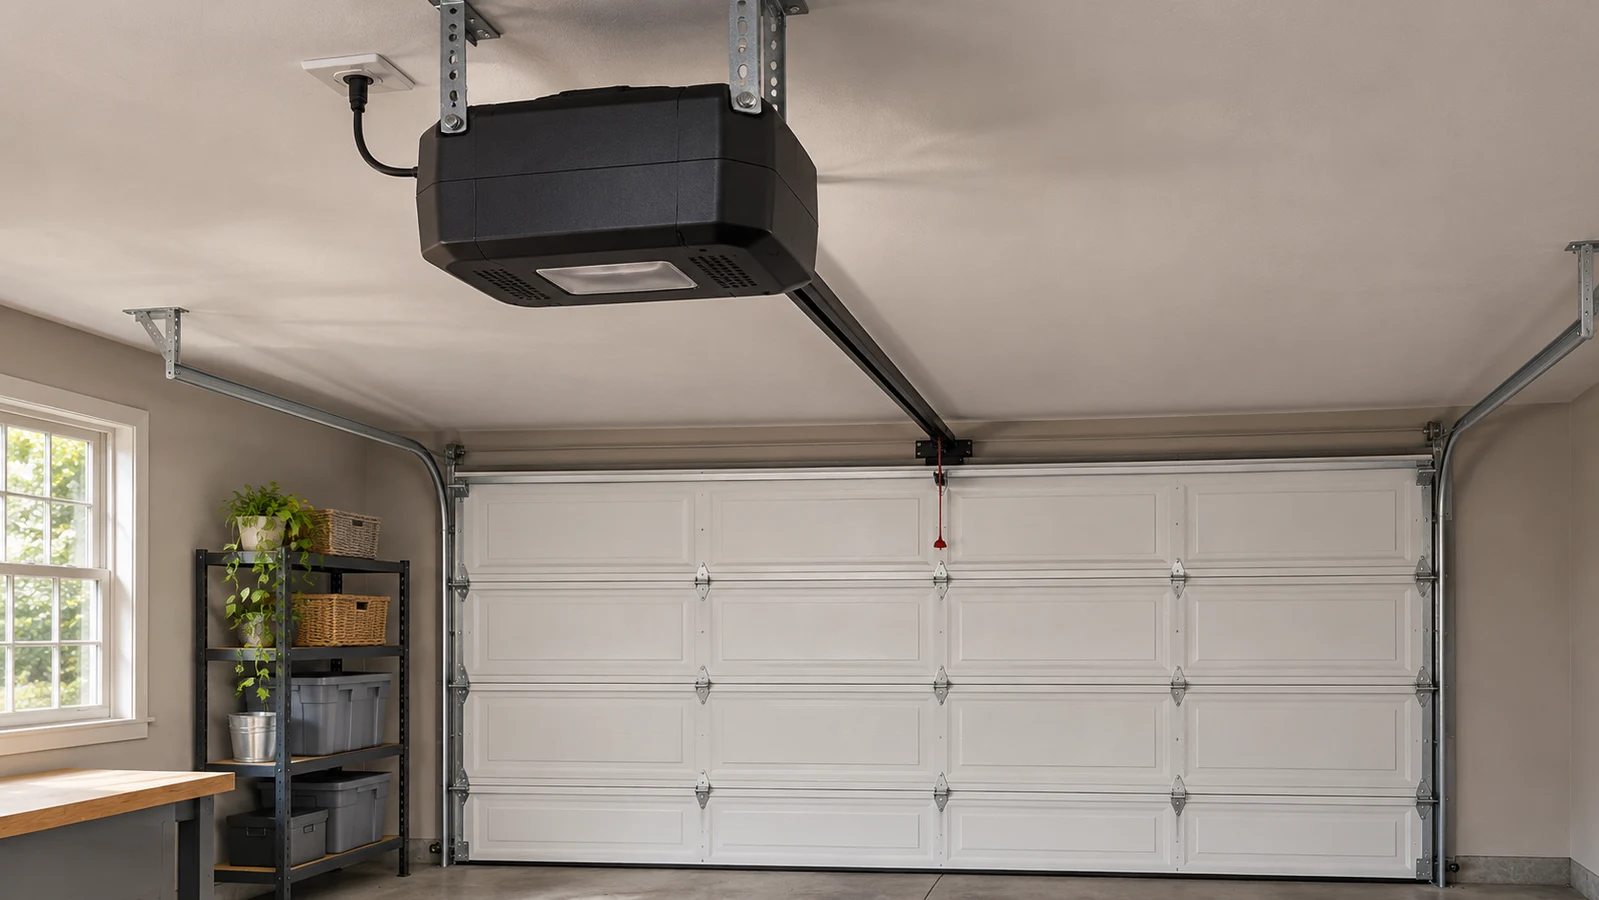
A ceiling-mounted trolley opener has a narrow rail above the center of the door. The trolley is the moving piece that travels along the rail, and an arm connects it to the top of the door. A chain, belt, or screw moves the trolley, depending on the design. The door itself still follows the side tracks. Those tracks guide the rollers and are separate from the center rail.
A wall-mounted unit, often called a jackshaft opener, sits beside the opening and turns the shaft of a compatible door system. Some garages use this design to keep the ceiling clear. It still needs the right door system, support, clearances, and safety devices listed in its documentation. A visible torsion tube alone does not prove compatibility, so the installer has to confirm the whole arrangement for that exact unit.
The springs support much of the door’s weight. The opener applies controlled effort to move a door that is already balanced. If the door binds, drifts, or takes more force than before, the hardware and springs need attention first. Replacing the motor alone can leave the original problem in place. For the command-to-motion sequence, see how a garage door opener works.
Which parts belong to the opener?
- Motor housing (powerhead). Holds the motor and controls.
- Rail, trolley, and door arm. Carry the motion on a ceiling-mounted unit.
- Wall control. A fixed control inside the garage, wired or supported wireless.
- Remote or keypad. Sends a signal from a vehicle or outside the garage.
- Photo eyes (safety sensors). Face each other low on opposite sides of the opening and watch a beam across the doorway.
- Release handle. Disengages the opener so the door can move by hand, under the conditions in the manual.
A separate contact-reversal function responds when a closing door meets an obstruction. The manual shows what each protection feature should do and gives approved tests for a sound, working installation. If a test fails, stop automatic operation and schedule service.
On a door with a broken spring or visible damage, the release can allow sudden movement. Leave it alone and call a trained technician. On a sound door, follow your manual for release and reconnection, starting with the door fully closed when possible.
The springs and side tracks belong to the door, not the opener. This distinction helps when a repair estimate says “rail,” “bracket,” or “sensor” without naming the part. The garage door opener parts guide shows terms and locations. The DASMA opener safety guidance covers controls and reversing features.
Find your opener model and manual
Read the label on the motor housing, or use a receipt, install record, or support account tied to your opener. Write down the complete model code, including any suffix. A photo from the floor helps if you can take it safely. If the label is out of reach, ask a technician to read it.
Search the manufacturer’s support site using the full model identifier to find the matching owner’s guide. A series manual can cover several variants, and some accessories or menu choices apply to only some models. Check the model list and revision on the cover. An installation guide may also list compatibility limits and mounting requirements that a quick-start sheet leaves out.
Keep both manuals. The door manufacturer explains approved care and hardware. The opener manufacturer explains controls, accessories, diagnostics, and reversing tests. If you bought a home without either, ask the seller or installer to identify the model before buying a replacement accessory. A remote that came with the house may have been added later.
Use a help article or video only after you match your equipment and version. Two units can have similar light housings but different button layouts and signals. Compare your label and wall control to the manual’s images first. The guide to finding the opener model and manual suggests a record to keep with the system.
How to choose an opener for your door and garage
Start with the door. Record its condition, nominal width and height, construction, and anything attached that changes its weight. Ask the installer to confirm the measured opening and the space available. The opener instructions specify the door types, sizes, track arrangements, and accessories it supports. If the manual gives a motor rating as a selection criterion, apply it within those limits.
Next, walk through how you use the garage. Does someone leave before the household wakes? Is the garage the only practical entrance in a power cut? Is the ceiling used for racks or lighting? These answers tell you what to compare: rail clearance, noise, battery support, and control options.
Last, confirm what comes in the kit and what you must buy separately. Ask for the model of the included remotes, wall control, sensors, and any hub. Ask which parts of the old installation the installer will remove or reuse, and why.
| Opener type | What moves the door | Strengths and trade-offs | What to confirm |
|---|---|---|---|
| Chain drive | A chain moves the trolley along a central rail | Lowest cost, louder | Rail fit, approved door configuration, mounting, sound transfer |
| Belt drive | A belt moves the trolley | Quieter, often battery backup, higher cost | Rail length, model door limits, belt service support |
| Screw drive | A rotating screw moves the trolley | Check noise and parts support for the exact model | Approved rail and drive care, parts availability |
| Wall-mounted (jackshaft) | The unit turns a compatible door shaft | Frees ceiling space, highest cost | Door and shaft compatibility, side clearance, support |
The cost-and-noise pattern matches published guides. This Old House notes that chain drive models make more noise but cost less than belt drive units, and HomeAdvisor says belt drives are significantly quieter than chain drive systems. A belt helps with drive noise only. Rollers, track condition, and mounting vibration also affect what you hear, so ask how the installer will address those on your existing door.
Use the garage door opener selection checklist as a buying worksheet, and ask the installer to point to the manual sections that support the proposed setup.
Opener costs at a glance
These approximate U.S. ranges apply as of November 2026. They come from published national cost guides and are not quotes. The installed range includes the unit, labor, and a basic set of controls. Prices vary by region, door size, and what the install includes.
| Opener type | Unit alone (approx.) | Installed (approx.) |
|---|---|---|
| Chain drive | $130 to $250 | $350 to $650 |
| Belt drive | $160 to $450 | $400 to $800 |
| Wall-mounted (jackshaft) | Higher than belt | $600 to $1,300 |
For the overall picture, HomeGuide gives $300 to $900 as the average total installed cost, and Fixr’s national average is $480 for a three-quarter horsepower belt-drive unit, with a high end near $1,100 for a smart jackshaft unit. Liberty Home Guard puts a new opener at $300 to $700 installed for most homes. The chain and belt rows above come from an independent home-inspection price guide, and the unit-only column from HomeGuide and Fixr.
What moves an opener price up:
- Drive type and horsepower. Wall-mounted and belt models cost more than basic chain drives.
- Smart features and battery backup. Both add to the unit or kit price.
- A heavy or insulated door. It may need a stronger unit than the one you are replacing.
- Electrical work. A new outlet or ceiling support is often outside the door company’s scope.
- Door repairs found during the visit. A worn spring or rollers can add $120 to $350 and $100 to $250 on top.
HomeGuide also lists motor replacement on an existing opener in the $300 to $600 range for a chain drive and $300 to $700 for a belt drive. A motor swap close to the price of a new opener is worth comparing against a full replacement. For overall quote structure see the garage door opener installation cost guide and the garage door costs guide.
Mounting, space, and vibration
Three kinds of clearance matter. Headroom is the space above the opening. Sideroom is the space beside it. Backroom is the depth from the opening into the garage. Beams, lights, racks, outlets, and other equipment can occupy the space a rail or the rising door needs. The installer should check the movement path against the requirements of the actual model.
A ceiling-mounted opener needs proper support for both the motor and the rail, plus the connection to the top of the door that the door and opener specify. A side-mounted unit needs a particular shaft arrangement and clearance beside it. Show the installer anything that occupies the ceiling or sidewall. Moving a light or the motor affects access, power, and maintenance differently.
Vibration complaints can come from the drive or from the structure carrying sound into the house. Tell the installer where and when you hear it. “It wakes someone in the room above the garage when it starts” is far more useful than “it sounds old.” The door’s own movement can contribute, especially if the noise existed before the opener was fitted.
Leave a sagging rail, shifted mounting hardware, or a motor unit that moves in operation to a technician. Ask for the proposed support method in the quote. The garage door opener mounting guide explains terms and common sound paths.
How travel limits relate to safety
Travel limits are the positions where the opener stops the door. The opening limit affects clearance at the top. The closing limit affects how the door comes down at the floor. Different designs set limits in different ways, and a similar-looking control panel can behave differently across models.
If the stopping point changes, there may be a physical cause. Floor resurfacing can change where the bottom seal meets the floor. A door that tilts, rubs, or develops a new gap can have shifted hardware or a balance problem. A visit should address visible damage or binding before anyone adjusts opener settings. Turning up motor force to compensate is not a substitute for that inspection.
If the door ends its travel early after service, report the direction, the position, and the recent work. The technician can check mechanical movement, the arm or drive connection, safety devices, and model-specific setup. If settings were changed, ask to see the final reversing checks per the manual. See what opener travel limits control for the difference between endpoint settings, motor effort, and reversal. Stop automatic operation if the door fails a protection check or moves in a way that suggests damage.
Remotes, wall controls, and keypads
A wall control is the fixed control inside the garage. A remote sends a wireless command from a car or elsewhere. A wireless keypad lets an authorized user enter a code outside. Each has to fit the opener’s supported control system. A remote called “universal” may cover only certain systems, and the compatibility list can depend on the exact accessory model.
When you add or replace an accessory, match your opener model against the accessory maker’s current compatibility list. A frequency printed on the package is only one piece of information. The communication and credential system also has to match. Follow the manual’s procedure for the specific job, such as adding a remote without clearing the existing ones.
Keep a count of controls. A household may have a car remote, a keypad, and a fixed button. If a handheld remote goes missing, use the approved procedure to revoke access, or ask the manufacturer or a technician. Depending on the model, you may need to reauthorize the other devices. Review your list when a vehicle is sold or an occupant moves out.
If a remote fails but the wall control still works, that narrows the diagnosis. A visible door fault still takes priority. Do any setup with the door and its path in view, as the instructions require. See how to program a remote using the right manual.
Smart opener and phone features
A smart opener may offer phone alerts, a door status display, household access management, or remote commands. Some units have networking built in. Others rely on an accessory with its own sensor, power, and account. Check current manufacturer documentation and what is actually in the box, and decide which functions must work when the internet is down.
Think about access. A service visitor, a family member, and a new owner may need different levels or time periods of access. Check whether the current app supports individual accounts or temporary permissions for your product, how to remove a user, and which local controls keep working if the main account changes. Test these from a safe spot while the door is working normally.
A status message depends on network communication and on how the system senses the door position. If the app shows an unexpected status, check the real door position from a safe place before sending more commands. If the model offers unattended or scheduled closing, ask what protections apply, and use such features only under the conditions the manufacturer describes.
Ask the installer to hand over the equipment and the account setup. Store recovery details securely and agree on who owns the account if more than one adult manages the garage. The smart garage door opener guide helps you compare local controls, remote features, and permissions.
Battery backup and a power outage
A backup battery on a compatible opener can give limited operation in a power outage while it has charge and the door system is safe to run. The model determines how backup works, which features are available, what alerts mean, and how to service the battery. HomeAdvisor notes that belt drive openers often include a battery backup, unlike chain drives, though that varies by model.
Ask whether the backup is built in, in the box, or an approved accessory. Ask for the replacement battery identification and disposal instructions. Find out which controls the manufacturer says operate on backup, because lights, networking, and optional features can behave differently on battery power.
An outage and a mechanical fault can happen together. Before using the door, look for damage from a safe place. If it is cocked, dropped, displaced, or shows a damaged cable, keep it out of use. The battery only powers the opener. It does not restore mechanical support. Do not try the manual release if you see signs of a broken spring or a door stuck open.
Ask the installer at handover which signals mean normal backup operation and which suggest service. The guide to opener battery backup lists model questions to ask before you buy.
Age, service history, and repair or replace
Age tells you the product generation and which documentation applies. An older unit can still be judged by how it runs, how its protection features perform, whether the mount is sound, and whether approved parts are available. A newer unit on a distorted door can still have a serious problem. For a sound door, report changes in motor noise, controls, or consistency along with the age and model.
| Situation | Usual direction | Why |
|---|---|---|
| One remote or keypad fails, wall control works | Replace the accessory | The powerhead is fine |
| Sensor misaligned or failed | Repair the sensor | A sensor repair is typically $100 to $250 as of November 2026 |
| Motor fault, parts no longer supported | Compare motor repair with replacement | A motor swap at $300 to $700 approaches the price of a new unit |
| Failed safety feature | Replace or repair under a pro’s assessment | Do not leave the unit in automatic use |
| Door binding or heavy | Fix the door first | A new opener will struggle against the same problem |
| Mount damaged or rail sagging | Pro repair | Structural support is involved |
Before choosing an upgrade, list what you already have: working remotes, any keypad, local control, battery backup. Ask which can stay with a new model and which must be replaced. A service record with the model, install date, last repair, and symptoms shows whether you have a recurring issue. The opener age and service life guide explains how to weigh age against parts support. The opener repair or replacement guide compares both written scopes.
Signs a professional should look first. Visible shifts in the door, rail, or mounting; failed safety checks; and electrical damage such as damaged wiring or a burning smell. Keep clear, keep the system out of use, and ask whether the company handles both the door and the opener. If you see active fire or anyone is in immediate danger, leave and call 911.
Compare models and brands by the documents
Read the exact manual and package for each opener you are considering. Compare door fit, mounting layouts, protection features, supported accessories, backup behavior, warranty terms, and parts availability. Products released in different generations can share a name, so check that the manual applies to the model the installer quotes.
Compare equivalent installations. A ceiling unit with two remotes and battery backup is a different quote from a wall-mounted unit with a different accessory package. List the items side by side and ask the installer to identify everything you must buy or maintain separately. If a kit feature needs a companion app, check current support for your household devices.
Ask who honors the installation warranty, how you get covered parts, and whether the company gives you a handover sheet with the model and what was installed. Someone else may service it later. The opener brand comparison guide gives criteria you can apply to the models you are actually considering, rather than treating a brand name as proof of fit.
Choosing for three common garage layouts
A bedroom above an attached garage. Tell the installer what you hear upstairs and when. A rhythmic sound throughout travel has a different source from a short vibration at start. If a technician finds rough door movement, get that fixed before comparing openers. Ask where the motor or rail will be supported and whether the ceiling structure carries vibration into the bedroom. At handover, have another adult run a normal cycle while you listen upstairs.
A small garage with racks and lighting. Sketch the opening, ceiling fixtures, supports, and storage areas. The limits that matter are the door’s travel path and the space the opener and its supports need. Ask the installer to compare a suitable trolley unit with a wall-mounted unit if the site allows. A rack that clears a stationary door can still block part of its travel, so ask for a marked view showing what must stay clear, and agree who will move a shelf or light before the appointment.
A detached garage during an outage. List which entrances work when power fails and which need the opener. Check phone signal inside the closed garage if you plan connected features. Ask which functions depend on Wi-Fi, which are local, and what the backup can do at this location. If a keypad is the main outside control, ask how it behaves in an outage, and check that the household has a reliable way through a separate entrance.
Common opener problems at a glance
Start with what you saw before you stopped using the door. One symptom can come from several causes, and a model-specific indicator or a qualified inspection narrows the list.
| What you noticed | Plausible area to check | Homeowner or pro |
|---|---|---|
| One remote fails, another control works | That remote, its battery, or compatibility | Check accessible items per the manual on a healthy door |
| All controls dead after an outage | Supply power, backup status, or opener fault | Check accessible power status safely. Get help if it persists |
| Door reverses while closing | Beam interruption, obstruction, binding, or a protection response | Check the visible clear area. Pro if movement is abnormal or a test fails |
| Motor hums, door barely moves | Door binding, balance, or drive fault | Stop. Pro assessment |
| Rail or housing shifts during operation | Mounting or structural support | Stop. Pro repair |
| App offline, door appears closed | Connection, service, or account | Follow the setup guidance from a safe position |
Write down which control you used, the direction of travel, and any visible indicator. If you cannot tell where a noise came from, describe it without guessing. “Steady hum from above, door stayed at the floor” is enough for the company to prepare. A flash count with the model and light location beats an assumed code.
What you can check and when to get service
On a sound, working door, homeowner tasks include reading the model label, replacing an accessible remote battery per its instructions, and confirming which local and connected controls the manufacturer supports. Keep the door in view during approved operation. In an attached garage, tell the household who is using the controls while you check something.
Leave spring and cable work, mounting repairs, electrical repairs, and bent brackets to a trained garage door technician or an electrician. A technician should also evaluate opener programming when a settings change might mask a heavy or binding door. If a protection function fails, take the automatic system out of use until it is serviced. Never use people, pets, or body parts to test a safety feature.
Keep the manual where adults can find it, along with a note on who installed the opener, how to reach them, and which entrance works when the garage door cannot be used.
What goes into an opener quote?
A written quote may cover the unit, rail and mounting parts, controls, sensors, battery, labor, removal, and final setup. Ask how the installer will verify compatibility with the existing door, and who handles related work if a mounting surface or electrical supply needs attention. The same model name can come in different kits, so compare the exact items included.
Some service calls start with diagnosing the door and opener, and the quote may then offer a repair, a replacement, or a return visit for a part. Ask whether the visit fee is credited if you approve work. If the opener is part of a full door project, ask which items belong under the door installation and which under the opener.
Before the installer leaves, get the model and warranty in writing. Ask who to call if an accessory stops working and what happens if the door moves differently once you return to normal use. Ask for a demonstration of normal travel and the protection functions, watched from a safe position. A scope with a firm model, a firm kit list, and a firm handover is easy to compare. One that says only “install new opener” is not.
Four real-life opener scenarios
These are illustrations built from typical situations and the ranges above, not quotes from real companies.
Scenario 1: The remote stopped working, the wall button still does. The door moves normally from the wall control and the keypad. The likely cause is the remote itself or its battery. Replace the battery per the manual. If that fails, replace or reprogram the remote using the exact model’s procedure. There is no case here for a new opener. Check the compatibility list before buying a replacement remote.
Scenario 2: The opener hums and the door barely moves. This is the classic sign that the door is out of balance or a spring has failed. An opener is not built to lift the full weight of a door. Stop using it and call a technician. Spring replacement runs about $120 to $350 as of November 2026, while a new opener runs about $300 to $900. Replacing the opener first would spend the larger amount on the wrong part and leave the door still unable to lift.
Scenario 3: A 20-year-old chain opener dies and the family wants quiet. A bedroom sits above the garage. The family wants a belt drive, and a pro quotes $400 to $800 installed in the range above. The technician also finds worn rollers and a door that takes effort to lift by hand. Adding rollers ($100 to $250) and a balance check to the same visit saves a second call, and fixing the door removes a source of the noise that a belt cannot. The total might land around $500 to $1,050 ($400 + $100 at the low end, $800 + $250 at the high end), depending on whether the springs also need work.
Scenario 4: The garage is the main entrance and the power goes out in storms. The household wants battery backup. A belt-drive model with built-in backup costs more than a basic chain unit, so they compare two quotes. One lists the backup as included, the other lists it as an extra. They ask each installer how the keypad behaves on battery and whether the app works without Wi-Fi, then pick the quote that answers both. They also keep a plan for the separate side door.
Garage door opener safety reminders
When to call a pro. Stop operating the door if it is visibly uneven, off track, unsupported, or if a reversing protection fails. Call a trained garage door technician and verify any license required locally. Keep people clear of the door and keep its controls out of use while you wait.
Watch the door close from a clear place when you use a local control. Keep the path clear and store handheld remotes away from children. On an otherwise sound door, follow your manual for the safety checks and how often to do them, and report failures before returning to automatic use. Never bypass a safety sensor or disable auto-reverse to get a door to close.
The CPSC publication on garage door safety explains the risk of a door continuing to close on an obstruction.
FAQ
How much does a new garage door opener cost?
As of November 2026, a professionally installed opener typically costs about $300 to $900, based on national cost guides. Chain-drive units sit near the bottom of that range, belt drives in the middle, and wall-mounted units at the top, sometimes above it. Smart features, battery backup, electrical work, and door repairs can add to the total.
Can I use a different wall button to replace a broken one?
Check the opener documentation and the control’s compatibility list. Some controls communicate with the opener or support features beyond a simple command. Ask the manufacturer or a technician whether a replacement works with your model and what features it keeps. Leave damaged wires or a loose wall box for service.
Will a wall-mounted opener give me room for ceiling storage?
It can free the space a central rail and motor would use. The door still needs a continuous travel path, the side unit needs approved space, and the structure has to support anything you add. Have the installer mark the zones that must stay clear before you move storage.
Will the backup battery run other garage equipment?
An opener’s backup is designed for the specified opener functions. Read the manual to see which accessories run in backup mode. Plan separately for lights or network hardware that need their own power, and ask what local controls work without internet.
Should I keep my existing remotes after a new opener goes in?
Keep only the remotes the new model officially supports, and have the installer confirm which are authorized. Ask for a demonstration at handover. Remove or relabel unused remotes so they are not confused with controls for another door.
Does a louder opener mean it is close to failure?
A change in sound is a reason to pay attention. Note whether it happens at start, through all travel, or at one spot. Noise can come from mounts, the drive, or the door. If it comes with binding or uneven movement, stop using the door and arrange a professional assessment.
Is a new opener the fix for a door that struggles?
Usually not. The springs carry the weight, and the opener moves a balanced door. If the door is heavy, hard to lift by hand, or the opener strains, have the door and counterbalance assessed first.
Next step
- Save the full model number and find the matching door and opener manuals.
- List your available space, everyday controls, and outage needs, then compare equipment by the documents.
- If the door is damaged or a safety feature fails, keep it out of use and arrange service before changing or replacing the opener.