Garage Door Maintenance Guide: Prevent Expensive Repairs
Garage door maintenance is mostly looking, cleaning, and testing on a door that is working normally, then calling a pro for anything that involves springs, cables, or hardware under load. A monthly 10-minute routine, a seasonal pass, and a yearly professional visit cover most homes. As of November 2026, a tune-up with lubrication typically costs about $100 to $250, with repairs and any after-hours surcharge charged separately. Always follow your own door and opener manuals for products, test steps, and timing. If you see a loose cable, a crooked door, or a failed protection test, stop using the door and call.
What you’ll learn
- A monthly, seasonal, and yearly routine, with who does each task.
- What you can safely check, clean, and test yourself, and what to leave alone.
- How to read the manuals before you clean, lubricate, or test.
- What a professional tune-up covers and costs, dated.
- Which findings end a routine check and call for trained service.
Contents
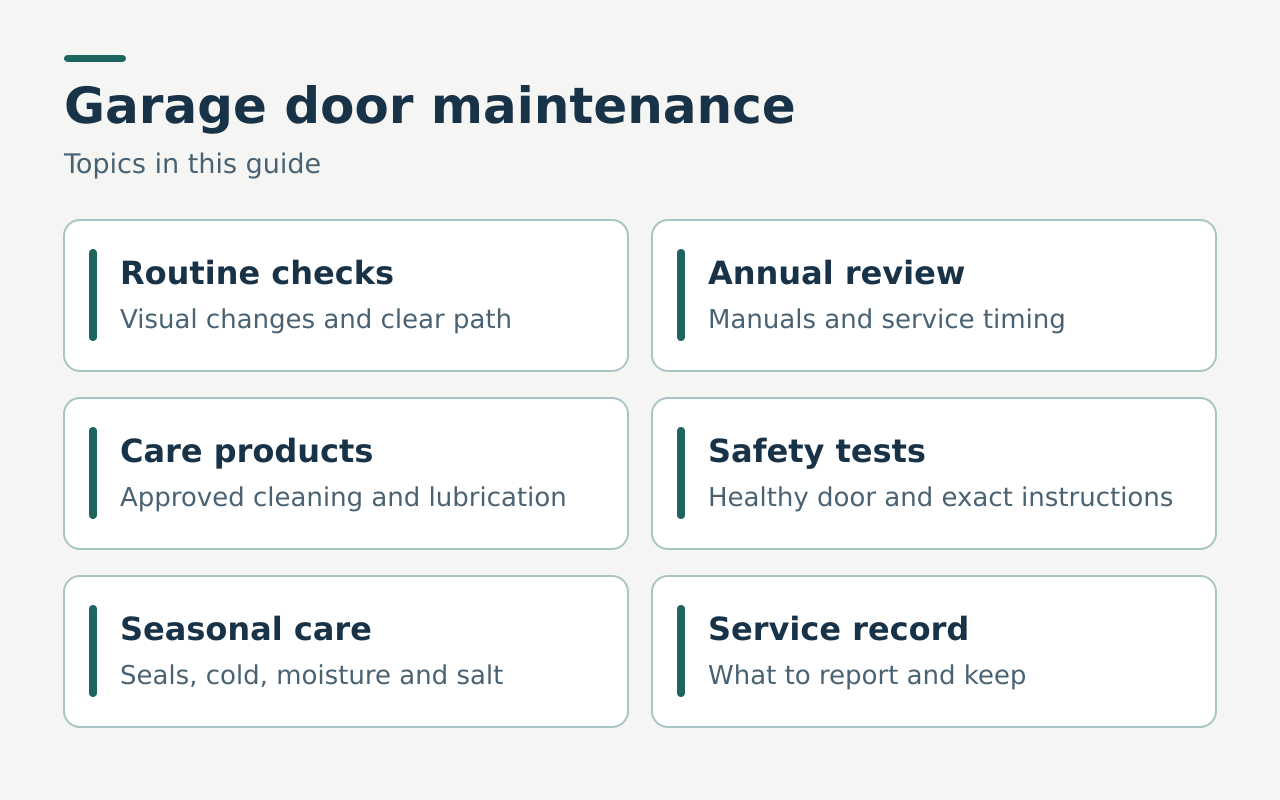
- A garage door maintenance routine that fits a normal month
- A monthly checklist you can repeat
- What to include in an annual maintenance review
- What a professional tune-up can cover
- Maintenance costs at a glance
- Keep a garage door maintenance log
- Care for a door that gets frequent use
- What to do after months of nonuse
- Use the right cleaning and lubrication instructions
- Auto-reverse and sensor tests
- Inspect the bottom seal and the floor area
- Winter maintenance and other seasonal conditions
- Read common maintenance findings
- Care by door surface
- More than one door, or a newly purchased home
- Keep storage, parking, and access from interfering
- When to leave maintenance to a trained technician
- Four real-life maintenance scenarios
- FAQ
- Next step
A garage door maintenance routine that fits a normal month
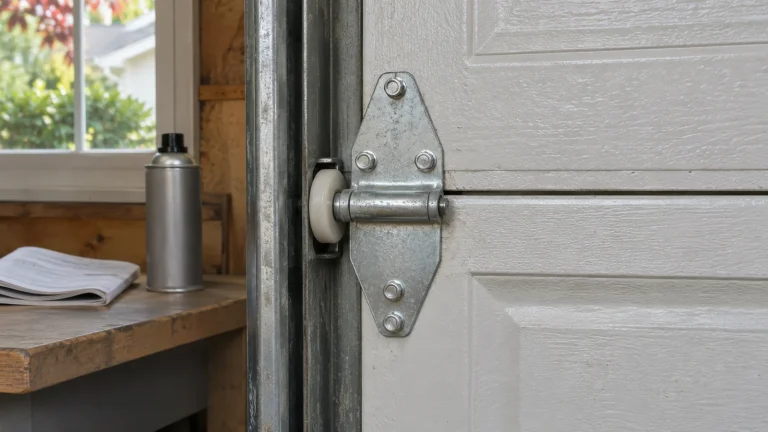
A sectional door is made of horizontal sections, joined by hinges, that follow channels at the sides. The small wheels in those channels are rollers. Springs and lift cables carry most of the weight, and the opener, if fitted, provides powered movement with its own controls and protection devices. The door manual and the opener manual cover different systems, so keep both.
A regular look catches changes that are easy to miss in daily use. Leaves and grit can pile up beside the door before they reach a sensor. A new streak on the bottom seal can show where it rubs. A change in motion from one end of travel to the other is a reason to stop and ask for an inspection. A routine lets you notice a change before you decide it is normal for the season.
Keep mechanical condition at the center. Do simple care only on a door that is sound and working normally, and look from a safe place first. If a cable is slack, a section sits crooked, or a bracket has shifted, end the check and call a professional. Maintenance day is a good time to notice a fault. It is a poor time to operate a door with suspected damage.
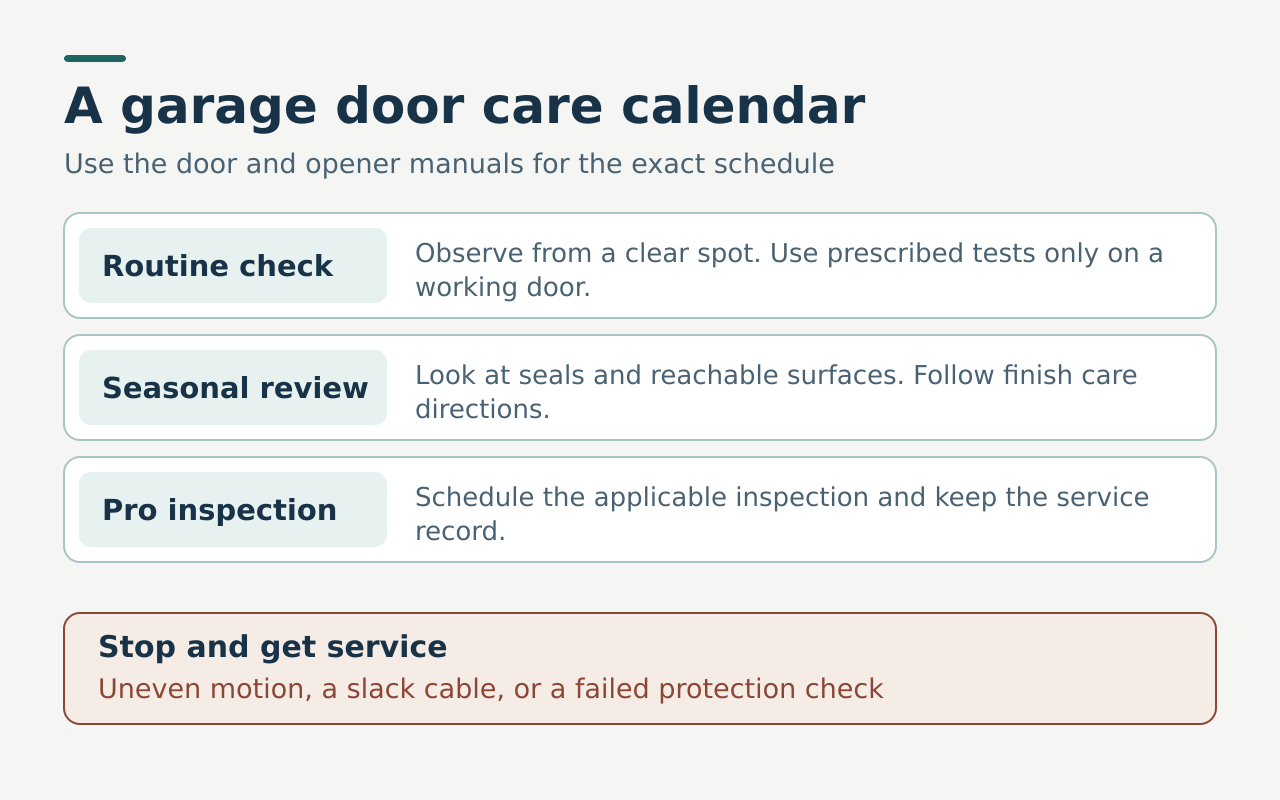
The DASMA opener maintenance guide recommends a monthly routine for inspection and testing. Use your manufacturer’s instructions for the actual test steps. Set a calendar reminder to open the right manual, look from a clear spot, and write down what you see.
| When | What to do | Who |
|---|---|---|
| Monthly | Visual review and any manual-approved test on a healthy system | Homeowner |
| Each season | Check the seal, clear reachable debris, read the care notes for the weather ahead | Homeowner, door stationary |
| Yearly (planning assumption; confirm with your manuals) | Professional inspection of springs, cables, tracks, rollers, hinges, and opener | Trained technician |
| Right away | Any safety fault: keep the door or opener out of use and arrange assessment | Trained technician |
A monthly checklist you can repeat
This takes about ten minutes. Start with the door stationary in its normal position, from a spot where you are clear of it.
Look (from the floor, door stationary)
- Is the door level, with even gaps between sections?
- Do you see a frayed or loose cable, a split spring, or a track that looks shifted? If yes, stop and call.
- Is a roller out of its track, or a hinge torn or bent? If yes, stop and call.
- Is a section creased, cracked, or pushed in near a hinge? Photograph it from a safe place and ask for an assessment.
- Are the photo eyes at the bottom of the opening clean and facing each other?
Clear
- Move bins, bikes, and tools out of the door’s path and away from the sensors, if you can reach them safely while the door is idle.
- Keep remotes away from children.
Run one normal cycle (only if the door passed the look)
- Stand clear and keep everyone out of the path.
- Watch for a tilt, jolt, catch, or new grinding. If it happens, stop, note where, and arrange service.
Test (per the opener manual, only on a healthy door)
- Run the sensor and auto-reverse test the manual describes. See the testing section below.
Record
- Write the date, what you checked, and anything to follow up. The monthly garage door maintenance checklist gives a compact version to keep by the manual.
Never climb, touch the spring system, or walk under a door with signs of damaged support. If you cannot do a step safely, skip it and note it for the technician.
What to include in an annual maintenance review
Once a year, read the door and opener schedules together. List the tasks coming due and which ones the manuals assign to a technician. Review the service history and how the garage is used today. A door used differently from last year may need a different inspection timing.
Go through these items:
- Finish and seal. Check whether the coating or material has special washing or refinishing instructions. Note chips, recurring damp patches, and light visible at one side.
- The space itself. Look at new shelves, lights, parking arrangements, or floor coverings, and confirm the travel path is clear.
- People and controls. Ask who uses the door whether noise, closing, or controls changed. Check remote batteries and authorized controls per the manuals. If someone no longer needs access, remove them through the approved process.
- Records. Update the log, warranty file, and installer contact.
Handle only ordinary cleaning yourself. Ask a technician about condition changes before attempting any repair. The annual garage door maintenance guide helps organize these checks and schedule the work that needs service.
What a professional tune-up can cover
Ask for an itemized description of the visit, because “tune-up” means different things to different companies. A technician may examine the tracks and mounts, rollers and hinges, sections, spring system, cables, and opener connection. The exact checks depend on the door’s design and condition. A technician should address known damage and decide which motion and protection tests are safe to run.
Share your log and tell the company what observation prompted the visit. The technician can then separate planned care from a fault that needs repair. If a cable is visibly damaged or a spring has broken, book the visit as a safety call and keep the door out of use.
Ask which care items were done, which inspections were included, and what was found. If the company recommends added parts, ask for the finding and a written scope before you approve. Ask what use is permitted until follow-up work is done, and get a summary before the technician leaves. The professional garage door tune-up checklist lists inspection and handover questions and helps you compare offers, even when companies use different names for similar visits.
Maintenance costs at a glance
These approximate U.S. ranges apply as of November 2026. They come from published national cost guides, combine parts and labor, and are not quotes.
| Item | Typical range | Note |
|---|---|---|
| Tune-up with lubrication | $100 to $250 | HomeGuide; standard and premium packages; found repairs are extra |
| Service call or diagnostic visit | $50 to $150 | Often credited to approved work |
| Weather stripping replacement | $50 to $150 | This Old House |
| Roller set replacement | $100 to $250 | Pro recommended |
| Cable replacement | $100 to $400 | Pro only |
| Spring replacement | $120 to $350 | Pro only |
| Weekend or after-hours surcharge | $50 to $150 | Varies by company |
Here is the arithmetic for planning routine care. A yearly tune-up at $100 to $250 over five years is $500 to $1,250. A single urgent spring job at $120 to $350, plus an after-hours surcharge of $50 to $150, is $170 to $500. Care does not prevent every failure, and springs wear with use, so the point is not to claim that maintenance is free money. The benefit is finding a worn roller, a frayed cable, or a failing sensor on a regular-hours visit, when you can compare quotes.
A tune-up can also turn into a repair visit. If the technician finds a worn cable, it becomes a separate line. Ask whether the tune-up fee is credited if you approve repairs, and ask for the finding in writing. The tune-up cost guide explains common package differences, and the garage door costs guide covers how to compare service scopes.
Keep a garage door maintenance log
The log can be short enough to keep on a phone. Give each door a clear label such as “left opening” or “detached garage.” Save the door and opener model information separately, list the most recent inspection and any assessed damage, and add the service company’s contact. Link or attach the right manual.
Record actions and findings together. “Wiped exterior per door manual, lower left finish shows a mark” says more than “maintenance completed.” If you noticed a new sound during normal use, record where it started and the direction of travel. Stop use if movement changed suddenly or a protection fails.
When a part is replaced, save the invoice and warranty and write what repair was tested. If you move into a house without records, note what is unknown and ask a trained technician to set a baseline. Use the full model number to identify the equipment.
The garage door maintenance log guide shows how to organize dates, changes, and service history. Keep access codes out of the log if you plan to share it with an installer or a future owner.
Care for a door that gets frequent use
A garage that is the household’s main entrance may see many full trips a day. A door of the same age that opens occasionally sees far fewer. Tell the technician how often each door is used and whether it stays open for long periods. Use, exposure, and installed parts all affect service planning.
On a sound door, build quick observations into ordinary use. Notice whether movement sounds consistent and the door reaches its usual positions. If you spot a change, note when it happens and which control you used. One observation with context is enough to arrange a visit. Do not ask several people to repeat a symptom.
Think about what traffic does near the door. Shoes, bikes, and storage bins drift toward the opening over a week. Give them a designated space that keeps the side areas and sensors clear, and remind everyone to keep people and vehicles outside the path when the door moves. The high-use garage door maintenance guide helps you review wear and discuss service timing with the installer.
What to do after months of nonuse
If the garage has been closed for a season, check its condition before you press any button. From a safe position, look at the panels and reachable areas for a shifted track, signs of water, pest damage near accessible controls, damaged cables, or new items in the travel path. Existing damage or mechanical doubt calls for service before operation.
Confirm that the approved controls are available and check any battery or power status in their manuals. Give a normal command only when the door is sound, the opening is clear, and everyone is in a safe position. Watch the full movement. If the door strains, stalls, or changes alignment, stop and get help. If you know what happened while the garage was unused, such as a storm or renovation, add it to the inspection record. The guide to garage door care after nonuse lists the safe observations to make first.
Use the right cleaning and lubrication instructions
Find the instructions for your door material and exact hardware. Washing the surface, cleaning a channel, and lubricating are three different tasks. The door maker can name compatible cleaners and approved points to lubricate. The opener maker gives separate instructions for its drive and accessories. A product that worked on an older door may not suit this one.
On a sound door, clear a work area and follow the manual’s positioning precautions before surface care. Where the instructions allow, use a soft cloth or nonabrasive tool on accessible surfaces, and keep water off electrical devices. Check painted metal, wood, and glazing separately, because finishes can call for different products and methods.
Use only the lubricant the documentation approves, on the points it names. A roller, rail, hinge, and weather seal can need different care, and some parts have no owner lubrication task at all. Keep lubricant off surfaces the maker prohibits. Leave anything involving tensioned parts to a trained technician, even if the system looks healthy.
If you hope lubrication will fix a new scrape, uneven motion, or visible track damage, arrange an assessment instead. The manual-based lubrication guide helps you find the right product instructions and boundaries. Save the manual revision or product information so you can look up the same directions later.
Auto-reverse and sensor tests
An opener with photoelectric sensors, or photo eyes, watches a beam across the opening. A contact-reversal function responds when the closing door meets an object. Your opener’s instructions describe the exact tests for your equipment. A normal light at one protection device does not replace the other checks for that model.
Read the procedure before you plan the test. Test only a sound door that is working normally, with people and pets out of the path. Use the conditions and approved objects the maker specifies, and keep hands, feet, and other body parts out of the path throughout. Get professional help if the manual is missing, the expected result is unclear, or you cannot do the specified test safely.
If a protection fails, stop automatic operation. Record which test failed, how the door moved, and which opener and controls are fitted. Tell the others who use the garage, then arrange service according to the manual. Leave hardware and control settings alone until the cause is assessed. Never bypass a sensor or disable auto-reverse to keep the door in service.
The model-specific auto-reverse test guide tells you what to look up and how to record results. The CPSC safety publication on garage doors explains the hazard of an opener that does not reverse. Follow your model’s current owner instructions for the test itself.
Inspect the bottom seal and the floor area
The bottom seal is the flexible strip where the closed door meets the floor. It helps limit light, dirt, and weather at the lower edge, and its fit depends on the door and the floor together. Cracks and a persistent gap are worth noting. A new gap alongside a lean or uneven door calls for trained inspection.
Look from both sides only if you can reach the other side safely by another entrance and the door is stationary and sound. Notice whether light shows in one small area, along most of the opening, or near a corner, and look for debris on the ground. Do not change closing settings to compress the seal or close a floor gap. Look into fit and condition first.
If you want a replacement seal, identify the door, the seal profile, and the retainer, which is the channel that holds the seal, if the maker documents them. As of November 2026, weather stripping replacement typically runs about $50 to $150. If the task requires contact with loaded hardware, get professional service. The bottom seal guide covers profiles, mounting, and questions for a supplier.
Winter maintenance and other seasonal conditions
| Season or condition | What to check | Who |
|---|---|---|
| Before freezing weather | Debris at the driveway edge and the floor area, seal condition, the manual’s finish care | Homeowner |
| Snow or ice on the floor | Loose ice you can reach from outside the path. Do not force a frozen door | Homeowner, door stationary |
| Road salt or coastal air | The maker’s finish-care notes, washing as approved, watch the lower sections | Homeowner |
| Damp garage | Where water sits and what reaches the door. Recurring moisture needs assessment | Pro or building trade |
| After a high-wind event | Photograph damage without running the door. Call if support is in doubt | Pro |
Before freezing weather, check the reachable floor area for debris that could block the door and review the manual’s seal and finish care. Keep a pedestrian route open if the garage door might be unavailable. If snow, ice, or a frozen seal keeps the door from moving, leave it stationary, use another entrance, and work out the cause.
A door that became hard to move after a freeze may have more than one problem. If it is skewed, unsupported, or shows a broken spring, treat that as the priority and get trained help. Do not force the door to break a bond at the floor. The winter garage door maintenance guide covers wet weather, snow, and freezing conditions.
Read common maintenance findings
Use this table after you observe from a safe position. An unsafe symptom takes priority over scheduled work.
| Finding | What to look at next | Who should act |
|---|---|---|
| Dust on an accessible exterior surface | The approved cleaner and method for the finish | Homeowner on a stationary, sound door |
| A leaf or loose object near a sensor | Whether it can be reached safely from outside the opening | Homeowner if safe |
| Cracks in the bottom seal or persistent light underneath | Wear location, floor condition, and the seal profile | Homeowner observation or pro |
| A track, hinge, or support looks displaced | Current door position and when the change occurred | Stop use. Pro |
| Door jerks or leans in motion | Support, track, rollers, and counterbalance | Stop use. Pro |
| A safety test fails on a working door | The procedure and result the manual describes | Stop automatic operation. Pro |
| An extension spring appears to lack a safety cable | Model and the arrangement you can see | Arrange professional inspection |
Keep a compact household checklist near the manuals: who handles each action and the date of the next check. Avoid posting access codes where visitors can see them.
- View the stationary door from a safe place. Look for changes in position, support, and the seal.
- Clear reachable objects outside the movement path while the door is idle.
- Follow the right manual for approved cleaning and lubrication on a sound door.
- Use only the manual’s safety tests when the system is working and the area is clear.
- Note changes, stop using damaged equipment, and book the right service.
Care by door surface
Painted metal. Note the finish and the cleaning method the maker lists. Lower surfaces take the most road dirt and salt. If you see a chipped coating, record where and read the finish-care instructions before using a touch-up product. Get an assessment for damage that affects a section’s structure or hardware.
Wood or wood overlay. Finish requirements differ by product and exposure. Ask for the current instructions and record which surface is wood. If the door is refinished during other house work, give the contractor the product documentation and keep paint and coatings off moving and safety hardware unless the instructions explicitly cover it.
Glazing and frames. Windows can have their own cleaning rules. Read the glazing information before using a household product. If a pane is cracked or a holding clip looks loose, leave the door idle and arrange an assessment. Ask which replacement parts are approved. If the manufacturer’s instructions are missing, ask the supplier for the approved method.
Surface care is simplest when you know the finish, glazing, and manual revision. Schedule washing for a day when you can meet the maker’s conditions for rinsing and drying, and keep water away from controls. Skip any area you cannot reach without touching moving or loaded hardware, and ask a technician about it.
More than one door, or a newly purchased home
Two or more doors. Make a separate log entry for each opening. Record which door is used by vehicles, which is used mostly for storage, and which has an opener. Save a photo of each setup from a safe point with the door closed, and keep the model records with the photos. One door may have different windows, a different track layout, or a different opener, so its tasks and parts can differ from the door beside it. Label problems in terms that make sense from outside, such as “left opening facing the driveway,” and tell all adults which door is out of service.
A newly purchased home. Gather paperwork from the previous owner: manuals, installation and service records, warranty details, and any changes to sections or hardware. If paperwork is missing, ask a technician to confirm the arrangement and give you a baseline condition report. Ask whether the counterbalance, mounts, tracks, and protection features were checked, and have known unsafe or failed items fixed before ordinary use. Once the system is sound, watch a demonstration from a safe position and ask where to find the supported owner tests. Update household access and remove previous users through the documented process.
Keep storage, parking, and access from interfering
The door needs room beside the opening and, as it rises, overhead. A new shelf may be fine with the door closed and still sit in the path when it is open. Ask the installer to review placements when an item could share a support or occupy the moving path, and keep objects away from sensors and controls.
Plan where passengers, pets, and children wait when a car leaves: outside the opening and away from moving equipment. Teach everyone to watch the door while using a local control and to report an unexpected stop. Review the plan when you add a larger car, a floor mat, a workbench, or overhead storage, and ask whoever installs it to keep the path and the opener support clear. If the door starts rubbing or a sensor gets bumped during that work, stop operation and have a trained technician check the affected support or safety hardware before you resume the routine.
When to leave maintenance to a trained technician
When to call a pro. Stop operating a door with a loose cable, visible spring break, displaced hardware, new lean, or uncertain support. Stop automatic use after a failed protection test. Contact a trained garage door technician and verify any locally required license.
Springs, lift cables, drums, bottom brackets, and anything supporting an unstable door can carry dangerous loads. Leave them in place. A technician should also handle displaced tracks, pulled-out fasteners, damaged mounting surfaces, and electrical faults. If your opener or door has a protection fault, have it checked before returning to normal service.
Some manuals include a balance check for a healthy door. Balance is how well the spring system supports the door through normal travel. Follow the maker’s directions only when the system is sound. If you have any concern about weight, cables, or support, leave balance testing to a technician. Never disconnect a suspended or damaged door to see how it feels.
Tell the technician what you can without touching anything: the door’s position, the symptoms, the last repairs, and what changed in the garage. If a test failed, write down the exact result. Ask which checks were done before the technician declares the door ready. If another trade works in the garage, note the date and what changed, and ask the contractor to keep the door path, sensors, and opener supports clear. The DASMA residential inspection checklist gives criteria for stopping and requesting service.
Four real-life maintenance scenarios
These are illustrations built from typical situations and the ranges above, not records of real service calls.
Scenario 1: A monthly look finds a frayed cable. During the monthly check, a homeowner sees a few loose steel strands along the lower left edge of the closed door. They do not run the door. They call a technician in regular hours and describe what they saw. Cable replacement runs about $100 to $400 as of November 2026, and the technician may also look at the springs. The same failure on a Saturday night could have added a surcharge of $50 to $150. The monthly look gave them a choice of timing.
Scenario 2: The auto-reverse test fails. On a monthly test, the door closes onto the test object instead of reversing. The homeowner stops automatic use, tells the household, and records which test failed. A sensor repair runs about $100 to $250, but the cause could be force settings or something else, so they let a technician diagnose it. They do not tweak the settings or tape over a sensor.
Scenario 3: Getting ready for winter. A household in a cold climate reviews the manual’s seal and finish notes, clears debris from the driveway edge, and checks the bottom seal. The seal is cracked. They get a quote: weather stripping replacement typically runs about $50 to $150. They also ask the technician to look at the rollers during the visit. In January, an iced bottom edge keeps the door from moving, and they clear what they can reach and do not force it.
Scenario 4: A new house, no records. A buyer finds no manuals and no service history. They book a tune-up at $100 to $250 and ask for a baseline condition report. The technician notes worn rollers and a seal at the end of its life, and recommends a sensor check. The buyer gets the findings in writing, approves the roller set at about $100 to $250, and starts a log. The inspection turned unknowns into a to-do list.
FAQ
How often should I do garage door maintenance?
A monthly visual check and test per the manual, a seasonal pass for the weather, and a yearly professional visit are a common pattern. Your door and opener manuals set the actual schedule, so confirm there. A door used many times a day may call for more frequent professional attention.
How much does a garage door tune-up cost?
As of November 2026, published national guides put a tune-up with lubrication at about $100 to $250. Repairs found during the visit are extra. Ask whether the fee is credited if you approve repairs, and ask for a written itemized scope.
Should I use a pressure washer on a garage door?
Use the method specified for the door’s finish and glazing. Some products need gentle care and have limits on washing. Keep water away from electrical controls and follow the maker’s precautions. If the door has visible damage, or you cannot confirm the approved method, get advice before washing.
Can a little daylight under the seal wait until my next check?
Record where it appears and whether the door is level and moving normally. A small gap can come from the floor and seal. Uneven movement or a new lean calls for a professional assessment. If the gap remains on a sound door, ask about seal and floor fit when you book service.
Can I lubricate the springs myself?
Do not touch the springs or the parts around them. Spring and cable areas carry stored energy, and your manual may name other points for owner lubrication. If you think a spring or cable needs attention, call a technician.
Can a maintenance log replace receipts?
No. A log shows when you did checks and what you saw. Keep invoices, receipts, and warranty paperwork with it. Ask the warranty issuer what records a claim needs and whether it specifies the care required to keep coverage.
What if the door and opener manuals recommend different schedules?
List each task with the equipment it applies to. The door manual typically covers the door, finish, and mechanical care. The opener manual covers controls and testing. For overlapping tasks, ask the manufacturer or a trained technician how to apply both.
Next step
- Open the door and opener manuals and put the first monthly check in your calendar.
- Walk the area from a safe position and write one baseline description for each door.
- If you see damage or a failed protection test, stop use and arrange trained service.