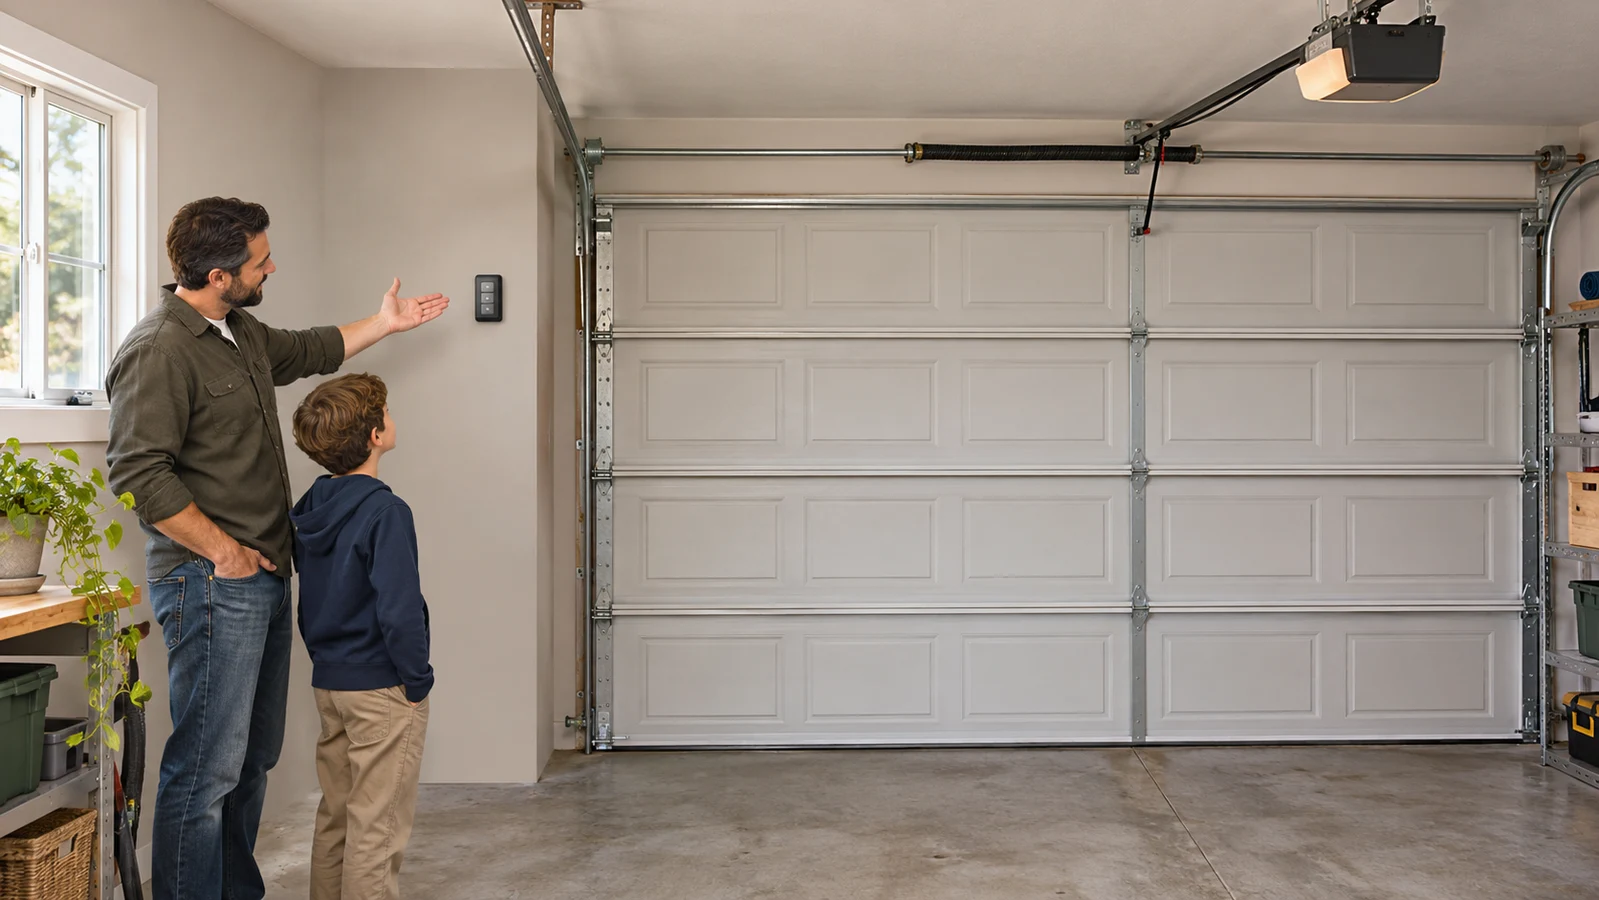
Garage Door Safety and Security Guide for Homeowners
Keep people, pets, and vehicles clear of the door’s path, watch every movement, and stop using the door if it leans, sits crooked in its tracks, shows a loose cable, or fails a reversal test. This garage door safety guide covers family rules, sensors, the emergency release, outages, home-buyer checks, and control of who can open your door. As of November 2026, a replacement sensor pair typically costs about $70 to $190 installed, while spring and cable work belongs to a trained technician. Always follow your own door and opener manuals.
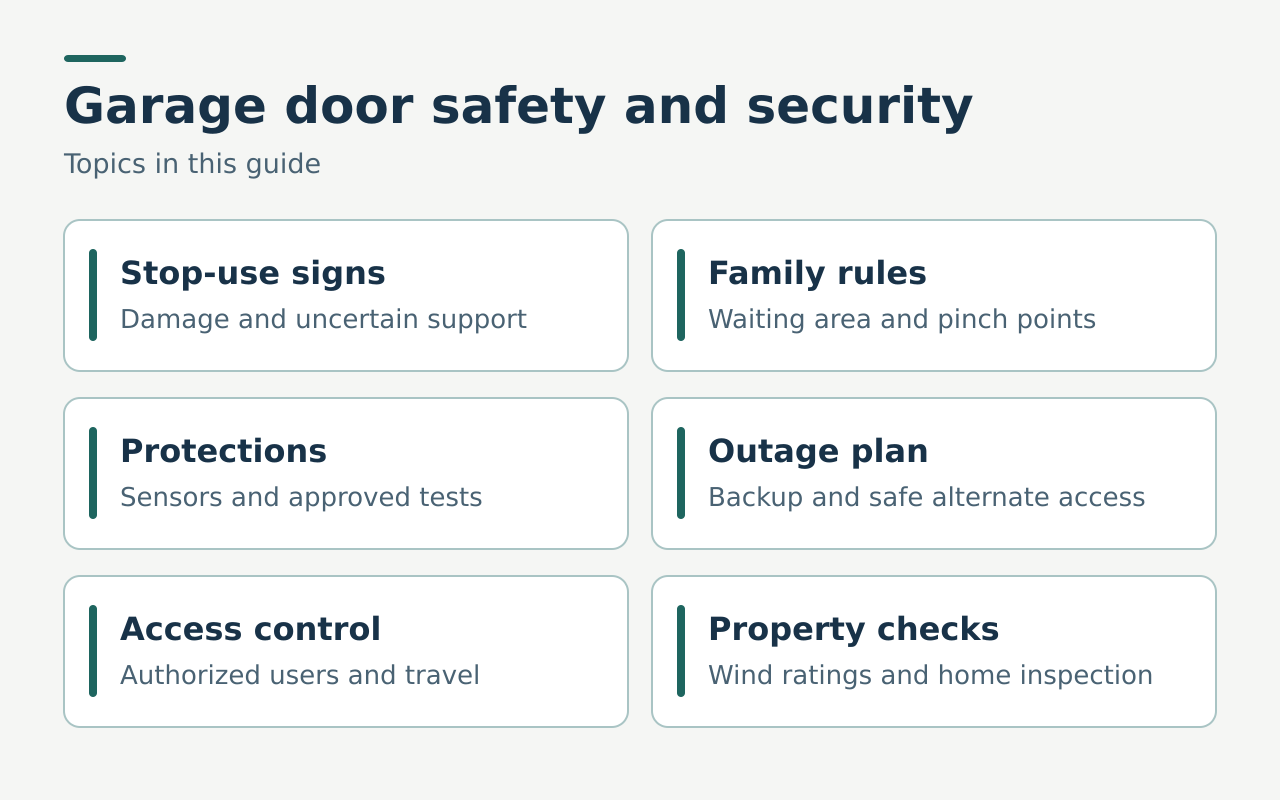
What you’ll learn
- Which conditions mean “stop using the door” and what to tell a technician.
- How to set family rules, test protections on a sound door, and plan for an outage.
- What a buyer can observe and what an inspector should assess.
- How to control remotes, keypads, and accounts, and what safety work costs.
Contents
- Garage door safety guide: the door, the protections, and who can use it
- When to stop using a damaged garage door
- Family rules for children and pets
- What safety sensors do and where their limits are
- What to know about the emergency release
- Why a broken spring changes the whole situation
- Pinch points around the door
- Prepare for a power outage
- Garage door safety during a home inspection or move
- Control garage access, at home and when you travel
- Wind ratings, storms, and impact damage
- Common safety observations and the next action
- DIY or pro: who does what
- What garage door safety work costs
- What an urgent or scheduled safety visit includes
- Four real-life safety scenarios
- Where these price ranges come from
- FAQ
- Next step
Garage door safety guide: the door, the protections, and who can use it
A sectional door is a stack of panels joined by hinges. Rollers, the small wheels on the panel edges, ride in steel tracks at the sides. Springs and lift cables carry most of the door’s weight. An automatic opener adds powered movement, plus controls and protection devices such as photo eyes. Each layer has a different owner when something goes wrong.
| Layer | What it includes | Who handles it |
|---|---|---|
| Door hardware | Springs, cables, tracks, brackets, hinges | Trained technician |
| Opener protections | Photo eyes, auto-reverse, emergency release | Homeowner tests on a sound door; technician repairs |
| Access | Remotes, keypads, wall controls, app accounts | Homeowner |
Safety is about preventing injury from a moving or damaged door. Security is about who can send a command or walk in through the garage. They overlap. A damaged door left half open exposes the house and is a hazard at the same time, and the right first move is to keep people away from the opening and call for trained help.
Before any normal movement, look at three things. Is the whole opening clear, including the areas where people wait? Can you see the door while you use the control? Does everyone know where to stand? Storage near the sides can block the view or the area around the sensors.
Pick one or two adults to manage access and keep the door and opener manuals where they can find them. Everyone else needs only two rules: stay out of the door’s path while it moves, and report anything unusual.
When to stop using a damaged garage door
Stop using the door, and tell everyone who has a remote, keypad code, or app access, if you see any of these:
- The door leans to one side or one corner sits lower than the other.
- A roller is out of its track, or a panel looks bent or separated at a hinge.
- A cable hangs loose, looks frayed, or has come off its drum.
- An exposed spring shows a gap in the coils, or you heard a loud bang from the garage.
- The door scrapes, jerks, or shudders in a way it did not before.
- The door will not stay put when stopped partway, or it moves on its own.
- A reversal or photo-eye check on a sound door failed.
- A vehicle, storm, or falling object hit the door or the framing around it.
The U.S. Consumer Product Safety Commission (CPSC) says doors that are unbalanced, that bind, or that stick should be serviced by a professional, not adjusted by the owner. Its publication on garage door openers also advises a check of the door and opener every 30 days.
The door’s position matters. A closed door with damaged support should stay closed. An open or partly open door with visible damage needs extra care: keep people and vehicles out from under it and use another entrance if you have one. If someone is trapped or in immediate danger, move to safety and call 911.
When you call a company, describe what you can see from a safe distance: whether the door is at the floor, overhead, or stuck partway, which side looks out of line, and whether a vehicle is inside. You do not need a closer look at a spring or cable to report a problem. Looking closer is how people get hurt.
For more signs, see when to stop using a damaged garage door. The DASMA residential inspection checklist explains why an owner’s inspection should end the moment a problem appears.
Family rules for children and pets
The CPSC has documented deaths of children trapped under closing doors on openers that did not reverse. Its advice for homes with children is simple: mount the wall button high on the wall, out of children’s reach, keep remote controls away from children, and teach them that a garage door is not a toy. Those three rules cost nothing.
Add a fourth: give kids one specific place to wait. “Stay out of the way” is vague. “Stand on the inside door mat until I come to get you” is a rule a seven-year-old can follow. Pick a spot that is well clear of the opening and the movement zone, and practice it once with the door stationary.
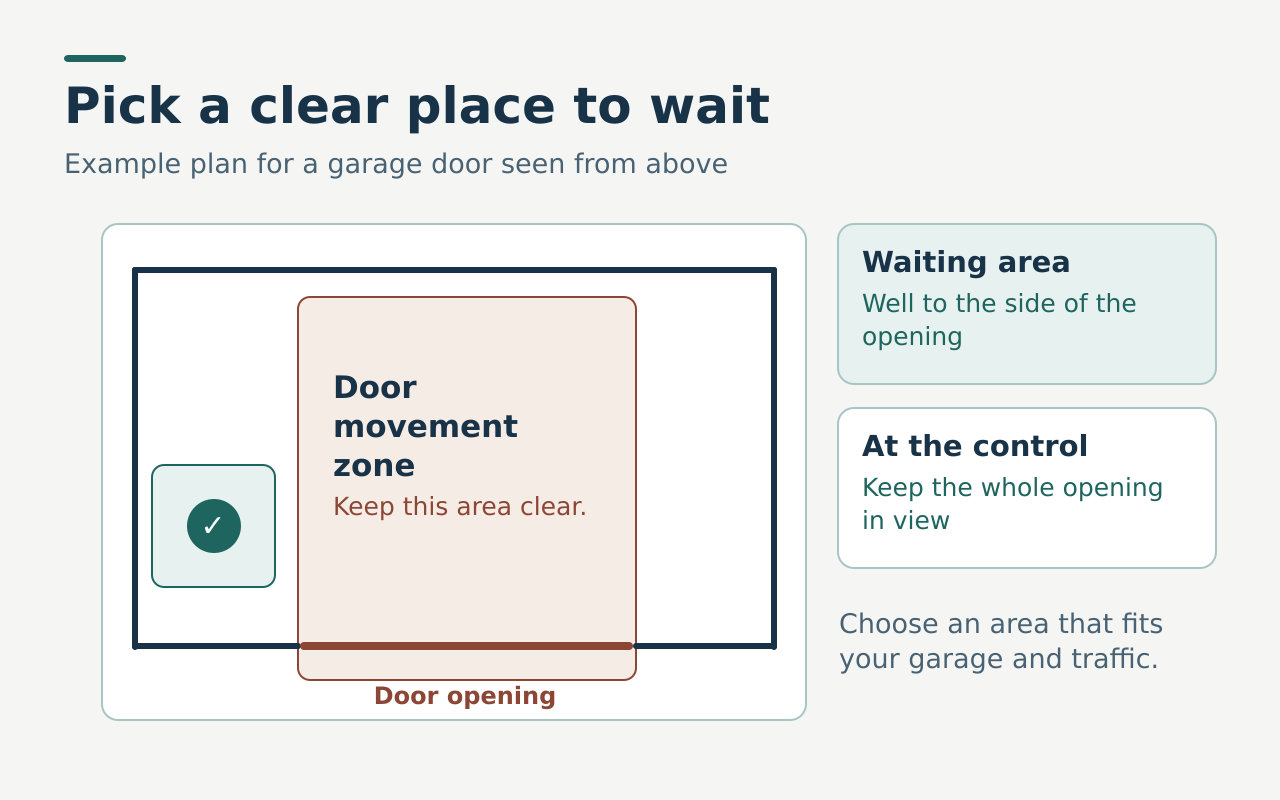
Rules that work for most households:
- The person who sends the command watches the door until it stops.
- Nobody uses a remote while holding a pet, carrying a load, or looking away.
- Children and visitors wait at the marked spot until an adult says the door has stopped.
- Pets are moved or gated first, not chased out of the way once the door is moving.
- Bikes, balls, and bins do not live near the sensors or the door’s path.
Adults need a routine too. If two people use the garage at once, agree who gives the command and say “door’s moving” out loud. After a distraction, such as a phone call or a pet running in, look at the whole opening again before you press the button.
If someone in the household uses a wheelchair, walker, or stroller, plan a route that stays clear of the door while it moves, and avoid sending the command until that person is past the opening and at their waiting place.
The garage door safety guide for children and pets has sample household rules you can print and post near the inside door.
What safety sensors do and where their limits are
Photoelectric sensors, usually called photo eyes, sit low on opposite sides of the opening and send an invisible beam across it. If something breaks the beam while the door is closing, the opener should stop and reverse the door. According to the CPSC, federal rules require reversing systems on openers made or imported after January 1, 1991, and added external entrapment protection, such as an electric eye or a door edge sensor, from 1993. The CPSC says an electric eye should be mounted 4 to 6 inches above the floor.
Sensors help, and they have limits:
- They protect the closing path. They do not make it safe for a person to walk or crawl under a moving door.
- A steady indicator light shows that the pair is powered and aligned. It does not prove the whole door is sound.
- They do not detect a worn spring, a loose cable, or an unbalanced door.
- Sunlight, dirt, a bumped bracket, or stored items can interrupt the beam without any damage to the sensor.
Keep the sensor area clear of bikes, bins, and loose items. Wipe the lenses with a soft dry cloth if the manual allows it. Report a sensor that looks cracked, hangs loose, or points in a new direction.
Use only the test your opener manual describes, on a door that is moving normally. The CPSC publication describes a reversal check with a board laid flat in the door’s path. Your manual may specify a different object or method, so use the manual’s. Keep your hands, feet, and body out of the path, and stay clear while the door closes.
If a test fails, stop automatic operation and book service. Write down the opener model and what happened. Never tape over a sensor, disconnect it, or hold the wall button as a workaround. A door that closes only while you hold the button has a fault, and the fix is repair, not a habit. As of November 2026, a replacement sensor pair typically costs about $70 to $190 installed, a small price next to what the sensors protect.
The garage door safety sensor guide explains the beam, contact reversal, and what each check can and cannot tell you. The DASMA opener safety tips cover reversal and control placement, and the DASMA opener maintenance guide describes a monthly check.
What to know about the emergency release
The emergency release disconnects the opener’s drive so a sound door can be moved by hand. On many trolley-style openers it is a red handle hanging from the rail. Other designs use a different mechanism, so find yours in the opener manual while the door is working normally, and show the other adults where it is.
The release is for a sound door during an outage or an opener failure. It is not for a door with a broken spring, a slack cable, or an off-track panel. Without the opener holding it, a door with failed support can fall or move suddenly. If anything looks damaged, leave the release alone and call a technician.
If the door is sound and you need to use the release, the manual’s instructions govern. In general, starting with the door fully closed is safer than releasing it while it is raised, and keeping fingers away from panel joints applies as always. Do not reconnect the opener until you have read the manual’s reconnection steps.
If the garage is your main way into the house, plan a second route now. Know which door is the alternate entrance, where its key lives, and whether it locks from the inside. During a mechanical fault you may need that route for days, not hours.
The garage door emergency release safety guide covers when to stop and call a professional. Ask the installer or technician to demonstrate the release on a sound door at your next visit.
Why a broken spring changes the whole situation
The spring system does most of the work of holding the door’s weight. When a spring breaks, the opener and the remaining hardware are suddenly carrying a load they were never meant to lift alone. A second spring, where one is fitted, does not mean the door is safe to keep using.
From a safe place, signs of a break include a loud bang, a visible gap in an exposed coil, a door that feels very heavy, a new lean, or an opener that strains and stops. Some spring designs are partly hidden, so you may see only the symptoms. Do not touch springs, cable ends, or brackets to confirm the cause. This hardware is under heavy tension. Leave the door where it is and tell the household not to operate it.
If a vehicle is inside, say so when you call. Ask for an urgent assessment if the door is suspended partway or if the garage is your only entrance. As of November 2026, national cost guides put a professional spring replacement at roughly $120 to $350, and urgent or after-hours calls can add 25 to 50 percent or more.
Use the broken spring garage door safety guide to see what position information to give a technician. After the repair, ask the technician to confirm that the door is balanced and that the opener’s protections work.
Pinch points around the door
A pinch point is any place where moving parts close on a finger, hand, or object. On a sectional door the gaps between panels open and close as each panel bends around the curve of the track. Hinges, panel edges, and the area where rollers travel are the main hazards.
- Keep hands out of the joints between panels while the door moves, and do not use them as handholds.
- When manual operation of a sound door is allowed, use the handle or the lift point the manual names.
- Teach children that the sides of the door are as risky as the bottom.
- Keep long items such as ladders and lumber away from the track side.
If the door will not move by hand the way the manual says it should, stop and call. A door that binds, sticks, or jumps in the track has a mechanical problem. Forcing it can change a small problem into an injury.
The garage door pinch point guide explains where panel joints and edges are risky. Keep people away from the door while a technician checks any panel that looks bent or shifted.
Prepare for a power outage
Before an outage, find three facts in the manual. Does your opener have a battery backup, and what does it do when it runs? Which controls work without mains power? How do you use the emergency release on a sound door? Keep that page, or a photo of it, somewhere you can reach without opening the garage door.
After an outage or a storm, check the door from a safe place before you use it. Look for a lean, a loose cable, or anything blocking the path. A storm, a vehicle impact, and a failing part can all happen at once. If the door is damaged, leave it alone. If it looks sound, follow the manual for the controls and keep the opening clear.
If you use a connected opener or app, ask which functions need the internet and which work locally. When power or Wi-Fi is down, the app may show an old status. Check the physical position of the door from where you can see it, and tell the household when the door is out of service so nobody tries to open it while someone is looking at it.
If the garage door is your usual entrance, decide ahead of time how you will get in and out during an outage. A side door with a key you can find in the dark is worth more than any gadget.
The garage door power outage safety guide provides a planning checklist.
Garage door safety during a home inspection or move
If you are buying, ask the seller for the door and opener manuals, service records, and a list of remotes, keypads, and accounts. A buyer can look at the door from a safe position and photograph its condition. Anything beyond a look, including tests of the protections, belongs to the inspector or a door technician.
A working remote proves that the opener receives a signal. It does not prove the door is balanced, the cables are sound, or the sensors reverse the door. Ask the inspector what was tested and what was only observed. If testing was limited, get follow-up recommendations in writing before you treat the door as ready for family use.
At handover, ask which remotes, keypad codes, and app accounts exist. Many openers let the owner erase stored remotes and codes and then add back only the ones in use, and the manual has the exact method. Do this in the first week, because earlier owners, contractors, and neighbors may still hold remotes or codes.
Set family rules before the first full day of use. Walk through where drivers park, where children wait, and where pets stay when the door moves. If the garage will be your main entrance, decide what happens in an outage.
Read the garage door safety inspection guide for home buyers for questions about records, physical condition, and safety equipment. If the seller pays for repairs, ask for the final invoice and any documented test results.
Control garage access, at home and when you travel
Security starts with a list. Write down every way into the garage: each remote, each keypad code, each app user, and each other door that connects to the garage. Then ask who still needs each one. The list is short for most homes and rarely up to date.
Practical habits:
- Give visitors and tradespeople only what the visit needs, and take it back afterward. A temporary keypad code is better than a spare remote.
- Do not leave a remote in an unlocked vehicle. Whoever finds it can open your garage.
- If a remote is lost or stolen, use the manual’s method to remove its authorization, or call the manufacturer or a technician.
- Keep keypad codes, app logins, and recovery details in a password manager or another secure place, not in a shared family note.
- Lock the door between the garage and the house, and treat any door from the garage into living space like a front door.
Before a trip, check what your opener offers. Some models have a lock or vacation setting that disables remotes and keypad entry. Verify in the manual what it blocks and what it does not, and choose settings that match your plan. Tell a trusted person who may check the house how to confirm the door is closed and what to do if it is not.
If you use app alerts, learn what they report. They may show door position and an event log. Treat an alert as information, not proof, and have a trusted person look at the real door from a safe spot when something looks wrong. They should not operate a door that looks damaged.
When you return, check that the door and its path are clear, review which temporary users still have access, and remove the ones that do not need it.
The garage door security while traveling guide covers access review and model-specific controls.
Wind ratings, storms, and impact damage
A wind rating describes how a specific door configuration performs under stated loads. It is not a general property of “a strong door.” The rating applies to a particular size, panel construction, window option, reinforcement, track and hardware setup, and installation method. Change one of those and the rating on the label may no longer apply.
If you live where building codes require wind-rated doors, ask your local building department what applies to your address, then confirm with the installer that the door, its reinforcement, and its anchoring match the product’s approval documents. Keep those documents with the door records. The Door & Access Systems Manufacturers’ Association (DASMA) publishes a wind-load inspection data sheet that explains why an inspection looks at the installation as well as the label. Your installer can tell you which sheets, if any, apply.
Before ordering a change, such as new window inserts or replacement panels, ask whether the change is covered by the approval. A new finish is a style choice. Hardware and anchoring are not.
After a storm or a vehicle impact, inspect from a safe distance with the opener stopped. Note any bend, new gap, loose bracket, cracked glass, or damage to the framing around the door. Stay away from hanging hardware and broken material, and stay clear of any exposed wiring. Tell the technician the door’s position and whether the opening is blocked. Ask whether the framing needs a separate inspection, and whether the company can secure the opening before permanent repair. If an insurer or the building department needs paperwork, arrange safety first and documentation second.
The guide to garage door wind ratings and approvals explains what to ask about labels and approvals.
Common safety observations and the next action
This table covers conditions you can see or report from a safe place.
| What you notice | What may be involved | What to do |
|---|---|---|
| Door leans or a roller is out of the track | Support or alignment has changed | Stop use, keep the area clear, call a pro |
| Cable hangs loose or off to one side | A loaded part may be damaged | Stay clear, call a pro |
| Loud bang, then the door is heavy or will not lift | A spring may have broken | Do not touch hardware, do not use the release, call a pro |
| Reversal or photo-eye test failed on a sound door | Protection system needs assessment | Stop automatic operation, book service |
| Door closes only while you hold the button | Sensor, alignment, or travel fault | Stop relying on it, book service |
| Remote is missing or a code was shared | Someone else may still have access | Remove it using the manual’s method, or call support |
| Door or framing damaged after a storm or impact | Support or structure may be affected | Keep clear, book an inspection |
| Power is out and the door is sound | Backup or alternate entrance needed | Follow the manual and use a confirmed route |
DIY or pro: who does what
When to call a pro. If the door is off track, leaning, unusually heavy, or has a loose cable or broken spring, stop using it and keep people away. If a reversal or photo-eye test fails, stop automatic use. Call a trained garage door technician and verify any locally required license.
A homeowner can look from a clear spot, keep the door’s path and sensor area free of clutter, run the manual’s approved tests on a door that is working normally, and manage remotes, codes, and accounts. A homeowner can also write down what happened and take photos from a distance.
A trained technician should handle springs, lift cables, drums, tracks, brackets, panel replacement, balance, and anything that changes how the door’s weight is held. A technician or a qualified electrician should handle wiring faults. Replacing a sensor pair is within reach for some owners with a matching model and the manual, but a failed reversal test after the swap is a stop sign, not a retry.
When a problem crosses systems, call in this order. Danger to a person: 911. A door that hangs unevenly or shows displaced hardware: a company that services the whole door system. Smoke, a hot outlet, or damaged wiring: leave the equipment alone, and call an electrician or emergency services as the situation requires. A damaged building frame: ask the door company which trade should look at it.
When you call, give the facts in order. Say whether anyone is in danger, then the door’s position, what you saw or heard, whether a vehicle is inside, and whether a test failed. Ask what must stay out of use until the visit.
What garage door safety work costs
The table gives approximate national ranges in U.S. dollars, as of November 2026. Ranges combine labor and parts unless noted. Local prices vary, and one guide can sit well above or below another, so these ranges are wide on purpose. Use them to spot a quote far outside normal, and get written local quotes before you decide.
| Item | Typical range | What pushes it up | DIY or pro |
|---|---|---|---|
| Service call or diagnostic visit | $50 to $150 | Distance, time of day, credit toward repair | Pro |
| Emergency or after-hours surcharge | 25% to 50% added; some totals $250 to $700+ | Nights, weekends, holidays | Pro |
| Safety sensor pair, installed | $70 to $190 | Brand match, wiring repair, labor | Owner or pro |
| Sensor pair, parts only | About $55 to $100 | Opener brand and model | Owner |
| Remote or keypad | $30 to $150 | Brand, programming, labor | Owner or pro |
| Opener repair | $150 to $350 | Part, wiring, age of opener | Pro |
| Opener motor replacement | $300 to $700 | Brand and horsepower | Pro |
| New opener, installed | $300 to $900 | Drive type, features, battery backup | Pro |
| Spring replacement | $120 to $350 | Torsion or extension, door size, one or both springs | Pro only |
| General door repair, national average | About $265 (range $155 to $379) | Parts, number of faults | Pro |
| Replacement door, common sizes | About $600 to $2,300 | Size, insulation, windows, wind rating | Pro |
Most of the safety-related items are inexpensive. A sensor pair or a keypad is usually a small bill. The expensive jobs, springs, cables, and panels, are the ones that are dangerous to do yourself, which is why the cost of professional service is rarely the real reason to try a repair at home.
Some things in the quote deserve a question. Ask whether the service fee is credited to the repair. Ask whether the price covers both springs or one. Ask what the company will test after the work and whether it will record the result. A wind-rated door or a different opener adds cost, so ask for a written price difference rather than a verbal one. The garage door costs guide explains how to compare written estimates for diagnosis, safety work, and repair.
What an urgent or scheduled safety visit includes
Ask the company whether the visit is an assessment, a stabilizing visit for a damaged door, a repair, or a scheduled check. Tell the dispatcher the door’s position and any hazards before the appointment so the technician can plan for them.
Before work starts, confirm the service or diagnostic fee, what will be documented, and how the company gets approval for added repairs. After work, ask which protection checks were done and what the results were. Get any use restrictions in writing, such as “do not use automatic close until the sensor is replaced.”
If another visit is needed, ask what can be done safely in the meantime. Keep the area clear if the door stays out of service, and tell the household which entrance is available. When a technician installs or replaces anything that affects the protections or access, keep the invoice, the model numbers, and the manual with your records.
Four real-life safety scenarios
These are composite examples, not case studies. Details and prices vary.
The door that will not reverse. A family runs the monthly check from the opener manual. The door closes onto the test object and keeps going instead of reversing. They stop using the remote, tell everyone not to use the wall button, and use the side door. A technician finds a misaligned photo eye and a force setting that needed adjustment. The visit costs roughly the service fee plus a small repair, and the technician demonstrates the reversal test before leaving. The family writes the result in a note kept with the opener manual.
The door that leans after a bump. A driver backs into the side of the door, and the next morning one corner sits lower than the other. The homeowner sees it from the driveway, keeps the kids away, and does not press the remote. On the phone they say the door is closed, a roller looks out of the track, and no one is hurt. The company can come the same day. The homeowner also asks whether the framing needs a look and takes photos from a distance for the insurer. The work is a pro job from start to finish.
The house with extra remotes. A buyer’s inspector notes that the door works but does not mention which remotes exist. After closing, the new owner finds two remotes in a drawer and hears that the previous owner’s contractor had a keypad code. Following the opener manual, they erase the stored remotes and codes, add back the two they use, and set a new keypad code. The side door into the house is already locked from the garage. The whole job takes less time than the move-in paperwork.
The outage with one entrance. A storm cuts power overnight. The garage is the family’s usual way out, and the opener has no battery backup. Before the storm, they had agreed that the front door is the alternate route and had a key at the entrance. The door looks sound, so an adult follows the manual, uses the release with the door closed, and keeps the children inside. After power returns, they reconnect following the manual and check that the door moves normally before using it again.
Where these price ranges come from
The ranges in this guide were compiled in November 2026 from published national cost guides. They are not local quotes. Sources included Angi’s garage door sensor cost guide (2026 data), HomeAdvisor’s opener repair cost guide, This Old House’s repair cost guide, Fixr’s repair and replacement guide, HomeGuide’s spring replacement guide, and Liberty Home Guard’s replacement cost guide. Modernize’s opener and service-call pages, Housecall Pro, and HomeGuide’s opener pages informed the service-call, opener, remote, and keypad ranges.
Safety facts about reversing systems, sensor height, the 30-day check, and child safety come from the CPSC’s publication Non-Reversing Automatic Garage Door Openers Are a Hazard. Where sources disagreed, the ranges here were widened to cover most of them. Confirm with written local quotes.
FAQ
How often should I test my garage door’s safety features?
The CPSC advises checking the door and opener every 30 days. Use only the tests in your opener manual, on a door that is working normally. If anything fails, stop automatic operation and book service. Keep a short note of the date and result so you can spot changes over time.
Is it safe to use the emergency release myself?
Only on a sound door, and only as the manual describes. Starting with the door closed is generally safer. If a spring or cable is broken, or the door is off track, leave the release alone and call a technician, because the door may drop or move suddenly.
Can I replace garage door sensors myself?
Some owners can swap a sensor pair if they match the opener model and follow the manual. As of November 2026, the part runs about $55 to $100 and professional installation about $70 to $190 total. After any swap, run the manual’s reversal test. If it fails, stop and call a pro.
What should I tell a technician when I call about a damaged door?
Say whether anyone is in danger, where the door is (closed, open, or partway), which side looks out of line, whether you heard a bang, whether a vehicle is inside, and whether a test failed. Mention the opener brand if you know it, and do not go near springs or cables to look closer.
How do I stop an old remote or keypad code from opening my garage?
Check the opener manual. Many models let you erase all stored remotes and codes, then re-add the ones you still use. If the manual is missing, search for the model number on the manufacturer’s site or ask a technician. Do this after buying a house, losing a remote, or ending a service relationship.
Do I need a wind-rated garage door?
It depends on local code and your area’s wind exposure. Ask your local building department what applies to your address. If a rated door is required, the label alone is not enough: the installed size, reinforcement, track, and anchoring must match the approved configuration, and the installer should supply the documents.
What if the garage door is my only entrance?
Plan a second route before you need it, with a key and a clear path. If the door is damaged or stuck, stay clear and tell the company about the access problem when you book. Ask what can be done safely to secure the opening while you wait for repair.
Next step
- Pick a waiting spot for children and pets, and share the family rules with everyone who uses the garage.
- Find your opener manual, write down every remote, keypad code, and app user, and remove the ones you do not need.
- If you see a lean, a loose cable, or a failed protection test, stop using the door and call a trained technician.